Deploying a Python Flask App to AWS via Elastic Beanstalk
A detailed guide with tips and tricks on how to deploy a Python Flask web app to AWS EC2 via Elastic Beanstalk using the CLI commands. Includes HTTPS setup.
In the last few months I had decided to learn the Python Flask Framework in order to be able to quickly launch small websites (including this personal one here). Having previously used Python for many data science projects, it seemed like a natural extension to learn to use Python for the web in a more professional manner.
This guide here summarises everything I learned in the process, and pays special attention to the slightly more tricky areas related to AWS. Here are the areas I go through in more detail below:
- What is Elastic Beanstalk (EB)
- EB CLI overview and the most important commands
- Single Instance vs Load Balancer: A question of cost
- Preparing your Flask app for deployment on EB with TLS (https)
- Deployment process via the EB CLI
- Checking for errors
- Useful resources which helped me along the way
What is Elastic Beanstalk
Elastic Beanstalk (or EB) is a completely free orchestration service from AWS. It simplifies the app deployment process for software engineers and removes a lot of the hastle related managing the infrastructure necessary to run your app. As a very simple example, if you are using the EB CLI to deploy your app, then in order to get your code to production all you need to type is
eb deploy
This single command takes care of packaging your code, copying it to AWS S3, and then from there orchestrating the EC2 server update so that your code appears on a live server environment. Within a couple of minutes your code is live.
Behind the scenes EB interacts (orchestrates) with many AWS services, including S3, EC2, Cloudwatch, Elastic Load Balancers, and Databases (if you are also running them as part of EB).
All in all, if you are an software engineer, or at least someone who needs a web app, or perhaps a REST API deployed, then EB is definitely an easy path to take.
Note that there are various ways to deploy via EB, including continuous continuous delivery pipelines . This guide here focusses on the EB CLI, so let's talk about it next.
EB CLI overview and the most important commands
The EB CLI allows you to manage your EB setup directly from the command line of your development machine. Visit the official website to download and install the EB CLI.
In my case I have a mac, and was able to download and install the CLI from here:
https://docs.aws.amazon.com/elasticbeanstalk/latest/dg/eb-cli3-install-osx.html
After you install the CLI, you'll need to configure it. Check this guide here:
https://docs.aws.amazon.com/elasticbeanstalk/latest/dg/eb-cli3-configuration.html
Your first most important configuration step will be to run from your command line:
eb init
This will take you through the setup process, where you'll need to setup a default region, but most importantly you'll need to provide the aws-access-id and the aws-secret-key.
You have not yet set up your credentials or your credentials are incorrect.
You must provide your credentials.
(aws-access-id): AKIAJOASASEXAMPLE
(aws-secret-key): 5ZRIrtd+321iI12d4EXAMPLEDtm+PiPSzpoK
You get this information from your AWS account after accessing it as the root user over here:
https://console.aws.amazon.com/
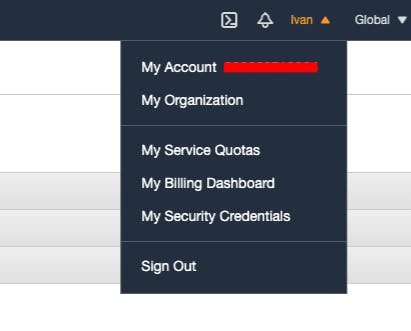
After logging in, proceed to the navigation in the top-right corner and click My Security Credentials .
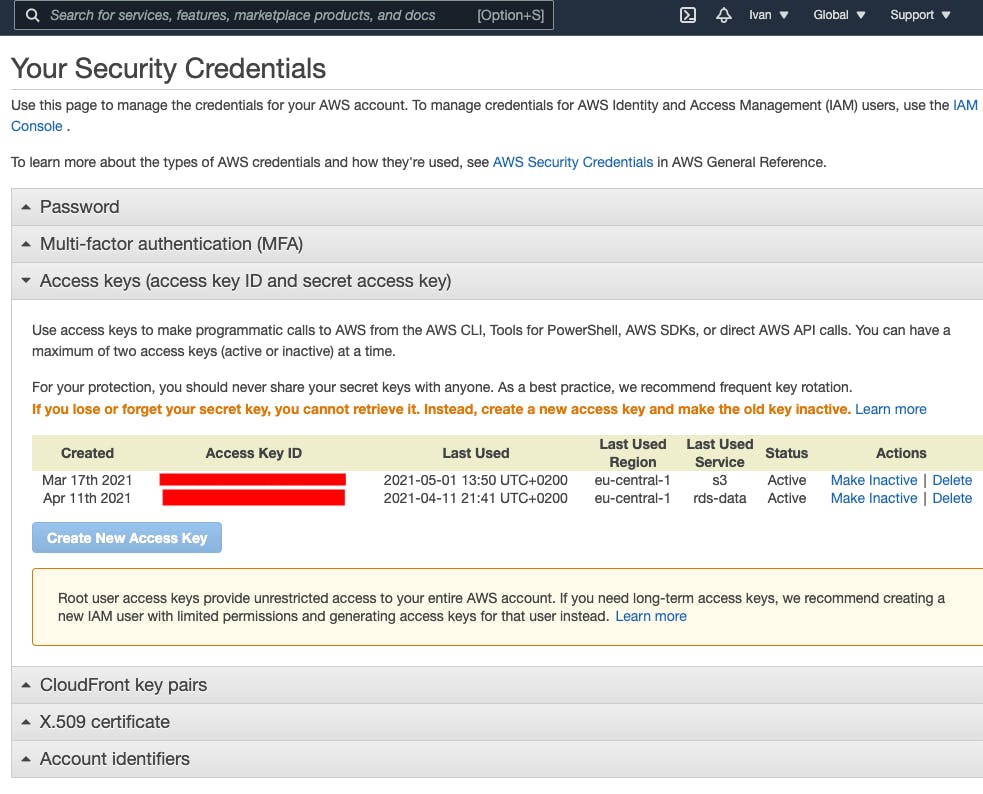
In the control panel you'll see your access keys. You can only have 2 of them. Incase you don't have any, then you can generate them here. The secret key can only be obtained once when you generate the key, after that you'll no longer have access to it.
After you've entered your access key id and secret, you'll need to click through a few more options, and your EB CLI will be ready for use.
Let's do a quick review of the EB CLI commands which I found most useful:
eb create
This command creates an application environment inside EB and deploys your app to it. When you run it, it will take you through a few questions which will help you set things up. The command also accepts a lot of options which you can use to completely bypass the questions, and immediately create what you want. Here is something I found handy:
eb create environment_name --single -i "t2.nano" -p python-3.8 -r eu-central-1 -k key_name -c sub_domain_name
Let's review the above:
- environment_name → this is the name you choose for your environment
- --single → this tells EB that you don't want to use an load balancer. This can save you money. We'll discuss this in the next chapter.
- -i "t2.nano" → spin up the smallest EC2 instance (cheaper)
- -p python-3.8 → which platform you want to use. In my Case this is python. You need to check what AWS supports.
- -r eu-central-1 → your AWS region
- -k key_name → this is the name of the EC2 key pair you want to use in order to securely access your EC2 instance via SSH using the eb ssh command which we'll talk about below. I found that setting this up here makes it much easier later on.
- -c sub_domain_name → this is the sub-domain name which will be used by your EB environment , e.g. http://sub-domain.eu-central-1.elasticbeanstalk.com/
eb terminate
As the name says, this kills your environment. You can restore it after, but I never needed to do that yet.
eb deploy
This command I mentioned right at the beginning of the article. It packages your code and all relevant files, and then deploys it. While a deploy is happening your instance is unavailable.
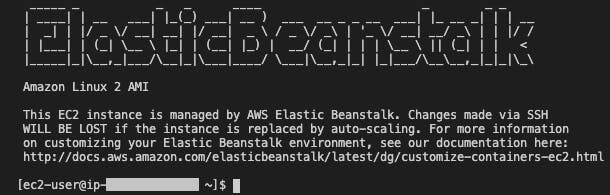
eb ssh
If you've created the environment with the -k key_name option above, then you'll be able to run the eb ssh command and immediately SSH into your EC2 server. This is very useful for viewing logs and perhaps doing some more advanced configurations if needed.
eb list
This allows you to see all your environments and applicants in the EB console. You can also run this command with the follow two options:
eb list --verbose --all
This will print out additional information.
eb use
If you want to switch environment, then you would use this command. I've often used it in combination with the eb list command.
eb console
This is another useful one for opening up the web console of your environment.
eb swap
This is another command which deserves special attention. It's very useful for deploying changes with 0 downtime. Let's walk through an example:
Let's assume you have an environment running on http://your-prod-env.eu-central-1.elasticbeanstalk.com/ and a CNAME record points from www.yourdomain.com to the above environment url. If you run eb deploy with a single instance environment then you'll have downtime.
What you can do is deploy your updated code to e.g. http://your-stage-env.eu-central-1.elasticbeanstalk.com/ and then use the eb swap command to swap the subdomain names of your environment, and basically promote a staging / testing environment to production.
You do this by running:
eb swap <production-env-name>
This will swap the subdomain name of your production environment with your staging / testing environment. Since your CNAME record points to your production sub domain, you'll have no down time.
Now, before we proceed to talk about preparing and deploying the Flask app, let's quickly discuss single instance environments and those behind a load balancer.
Single Instance vs Load Balancer: A question of cost
By default AWS provisions your environments with a load balancer. If you don't know what a load balancer is, I suggest to read up on it here since this article does not cover that topic.
Content coming soon.
Preparing your Flask app for deployment on EB with TLS (https)
Before I talk about certain specifics, I encourage you to read the official AWS guide here .
However, I noticed that this guide fails to talk about:
- Getting your domain to point to your web app
- Ensuring HTTPS works on your website (various techniques)
- Managing basic security, e.g.
- Costs
Content coming soon.
Deployment process via the EB CLI
Content coming soon.
Checking for errors
Content coming soon.
Useful resources which helped me along the way
- https://medium.com/edataconsulting/how-to-get-a-ssl-certificate-running-in-aws-elastic-beanstalk-using-certbot-6daa9baa3997
- https://github.com/r002/elastic-beanstalk
- https://docs.aws.amazon.com/elasticbeanstalk/latest/dg/https-singleinstance-python.html
- https://docs.aws.amazon.com/elasticbeanstalk/latest/dg/platforms-linux-extend.html
- https://www.nginx.com/blog/using-free-ssltls-certificates-from-lets-encrypt-with-nginx/
- https://stackoverflow.com/questions/32237379/python-flask-redirect-to-https-from-http